This post may contain affiliate links. For more information, see our Affiliate Disclosure Policy.
A few years ago, smash burgers went from a regional fast-food format to a genuinely widespread technique that home cooks everywhere are specifically pursuing over the traditional thick patty approach. Once you’ve had a properly executed smash burger – that deeply caramelized, lacy, crispy-edged patty against a soft toasted bun – the thick puck burger genuinely doesn’t have the same appeal. The smash technique is specifically more scientific and more interesting than it might appear.
These Blackstone smash burgers work because of the Maillard reaction, specifically and maximally. When a cold beef ball hits a screaming-hot griddle surface and is immediately pressed flat to a quarter inch, the maximum possible surface area of beef makes direct, sustained contact with the maximum possible heat. The fat renders immediately and pools around the edges. The proteins and sugars in the beef’s surface react at high heat to produce hundreds of new flavor compounds – the deeply browned, caramelized, almost lacey edges and surface that define a properly smashed burger. The center stays juicy specifically because the patty is so thin that it finishes cooking almost immediately, minimizing the time at heat that dries proteins out.
The specific combination of cold beef, maximum surface area, and maximum heat is specifically why smash burgers work and why thick patty burgers can’t replicate the same flavor. A thick patty has much less browning relative to its volume. A smash burger is almost entirely crust.
My husband specifically claims these are better than every restaurant smash burger he’s tried, which I choose to take as a genuine compliment rather than a polite one. We make them at least twice a month through the summer – the sizzle when the cold beef hits the hot griddle is one of the most specifically satisfying sounds in outdoor cooking. For another Blackstone griddle classic that uses the same high-heat-and-direct-contact philosophy for a quick, crowd-pleasing outdoor dinner, my Grilled Chicken Tenders with Lemon and Herb is the lighter companion when you want the griddle fired up for something other than burgers.
Why You Will Like These Blackstone Smash Burgers
- The smash technique maximizes the Maillard reaction by creating maximum beef-to-hot-surface contact – A quarter-inch thin patty on a screaming-hot griddle has more browning relative to its total mass than any thick patty format. The result is a burger that is almost entirely caramelized, crispy surface with a juicy center – the specific ratio that makes smash burgers specifically excellent rather than just adequate.
- 80/20 ground beef is specifically the fat content that makes the smash work – The 20% fat in 80/20 beef renders immediately on the hot griddle and pools around the smashed patty’s edges, basting the sides while the top browns from above. Leaner beef (90/10) doesn’t render enough fat to produce this effect and produces drier, less specifically caramelized burgers.
- Cold beef balls from the refrigerator are specifically better than room-temperature beef for smashing – Cold beef holds its sphere shape more firmly until the moment of smashing, producing a cleaner, more uniform patty. Room-temperature beef is softer and spreads less controllably when pressed. More importantly, cold beef’s surface temperature difference from the hot griddle is specifically greater, which produces a more dramatic, more immediate Maillard sear on contact.
- One flip only – the specific discipline that maintains the caramelized crust – The crust on a smash burger develops from the direct, sustained contact between the beef and the hot surface. Flipping multiple times repeatedly breaks and disrupts this developing crust on each side rather than allowing either side to develop fully. Smash once, sear undisturbed, flip once, add cheese, done.
- The Blackstone’s large, flat griddle surface specifically enables simultaneous cooking of all 8 patties – A Blackstone griddle’s flat, large cooking surface can accommodate all 8 patties at once, meaning all 8 finish at the same time and can be assembled simultaneously. A home skillet typically fits 2 to 3 patties at a time and requires multiple batches where the first batch cools while the second cooks.
- Double patty stacking immediately after cheese melting produces the most specifically indulgent format – Two smash patties with cheese melted between them produce a burger that is more complex in texture – the outer patties have caramelized crusts, the inner surfaces have the soft, tender quality of briefly cheese-warmed beef.
- From fridge to table in under 30 minutes – genuinely one of the fastest complete dinners available – With all toppings prepped and buns toasted while the griddle heats, the actual cooking is about 8 minutes per batch and assembly is another 3.
Blackstone Smash Burger Ingredients
Ten ingredients for a complete assembled burger.
Patties
- 1.5 lbs ground beef, 80/20 – divided into 8 equal balls (about 3 oz each)
- Kosher salt to taste
- Ground black pepper to taste
Assembly
- 2 tablespoons butter for toasting buns
- 8 slices cheddar cheese (Tillamook sharp cheddar specifically recommended)
- 2 cups shredded iceberg lettuce
- 4 slices red onion, thin
- 4 to 8 slices vine-ripe tomato
- 16 bread and butter pickle chips (or dill pickles)
- 4 burger buns, buttered and toasted
Smash Sauce (Highly Recommended)
- 1/2 cup mayonnaise
- 2 tablespoons ketchup
- 1 tablespoon yellow mustard
- 1 tablespoon dill pickle relish
- 1/2 teaspoon garlic powder
- 1/2 teaspoon onion powder
- Pinch smoked paprika
Ingredient Notes and Shopping Tips
80/20 ground beef – the specific fat content that makes smash burgers work: The fat percentage in ground beef is critically important for smash burgers in a way it isn’t for other applications. When the cold beef ball hits the screaming-hot griddle surface and is pressed flat, the fat begins rendering immediately and pools around the edges of the flattened patty. This rendered fat specifically enables two things: it bastes the exposed sides of the patty from below as it pools, contributing to the caramelized edge and the juicy interior; and it lubricates the patty’s contact with the griddle, preventing sticking while simultaneously facilitating the Maillard browning. Lean beef (90/10) doesn’t render enough fat to produce this effect. Very fatty beef (70/30) produces excessive fat that pools away from the patty rather than staying under and around it. 80/20 (also labeled “ground chuck”) is specifically the right ratio for maximum smash burger quality.
Sharp cheddar versus American cheese – the great smash burger cheese debate: Traditional smash burger shops typically use American cheese specifically because of its superior melting properties – American cheese contains emulsifying salts that produce a specific liquid, coating, glossy melt rather than the more separated oil-and-protein melt of natural cheeses. The result is the specific molten, coating, “smashburger” cheese quality most people associate with the format. Sharp cheddar (specifically Tillamook, as called for in the recipe) produces a less uniformly molten but more complex, more specifically flavorful melt that many people specifically prefer. Two 20-second windows of cheese on hot beef produce decent results with either. For the most specifically classic smash burger look and texture: use American. For more complex, more specifically cheese-flavored results: use sharp cheddar.
Brioche buns versus standard sesame buns: Brioche buns (enriched with butter and eggs) are the most popular choice for smash burgers in recent years – their slightly sweet, specifically buttery, soft character is specifically complementary to the deeply savory, Maillard-rich smash patty. They also toast beautifully on the griddle with butter. Standard sesame-seed hamburger buns are more specifically classic and produce a leaner, less sweet bread base that allows the beef’s flavor to come forward more completely. Both are genuinely good – the choice depends on whether you want the bread to contribute sweet richness or to step back and let the beef lead.
Smash sauce – why it’s worth making: The smash sauce (a burger-sauce variation of Thousand Island that’s been in American burger cooking since the 1970s) is the condiment that specifically ties the smash burger’s flavors together. Mayo provides the creamy fat base; ketchup adds sweetness and tomato; yellow mustard adds tang and bright acidity; pickle relish adds crunch and brine; garlic powder and smoked paprika add savory depth. Make it at least 30 minutes ahead and refrigerate – the flavors meld and improve significantly with even brief chilling.
Substitutions That Work
- American cheese instead of cheddar: Produces a more specifically classic smash burger look and texture with glossy, liquid melt; less complex in flavor but more specifically “burger shop” in character
- Pepper jack instead of cheddar: Adds mild jalapeño heat alongside the cheese’s richness; particularly good with the bread and butter pickles’ sweetness
- Dill pickles instead of bread and butter pickles: More specifically tangy and less sweet; produces a more specifically classic burger brine note; the choice is personal preference
- Caramelized onions instead of raw: Slowly sautéed in butter until deeply golden and sweet; cook them on the Blackstone’s cooler zone while the burgers cook on the hot zone
- Lettuce wraps instead of buns (low-carb): Use large, sturdy iceberg lettuce leaves as the bun replacement; wrap around the double patty stack; genuinely works if you’re avoiding bread

How To Make Blackstone Smash Burgers
Five stages: form the beef balls, prep the toppings and make the sauce, heat the griddle, smash and sear, assemble. Here’s every technique detail.
Forming the Beef Balls – The Most Important Setup Step
Divide the ground beef into 8 equal portions. Each portion should weigh approximately 3 ounces for a double-patty burger with adequate coverage of the bun. Do not compact or press the beef when forming the balls. Literally just break the beef apart, divide it roughly, and roll each portion loosely between your palms into a sphere. The loosely-packed ball is specifically better than a tightly packed one because it allows the beef to spread and flatten with more natural, irregular edges when smashed – the irregular edges develop the most specifically caramelized, lacey crust. A tightly packed ball produces a more uniform, denser patty with less textural interest.
Place the formed balls on a parchment-lined plate or tray. Cover with plastic wrap and refrigerate. Keep them refrigerated until the moment they go on the griddle – cold beef is specifically the goal. Room temperature beef is softer, spreads less controllably, and has less temperature differential from the hot griddle surface, which produces less dramatic caramelization on contact.
Making the Smash Sauce – 5 Minutes, Better Made Ahead
In a small bowl, whisk together the mayonnaise, ketchup, yellow mustard, dill pickle relish, garlic powder, onion powder, and smoked paprika until smooth. Taste – it should be creamy, tangy from the mustard and relish, sweet from the ketchup, and have a slightly smoky background note from the paprika. Cover and refrigerate for at least 30 minutes before serving. The flavors specifically meld and improve during the resting period. The sauce stores for up to a week in the refrigerator and is genuinely better on day 3 than day 1.
Why the Blackstone Needs to Be Screaming Hot Before Any Beef Touches It
Turn the Blackstone to high and allow 3 to 5 minutes of full preheating before any beef goes on. The griddle surface should be visibly hot – a few drops of water should immediately bead, sizzle, and evaporate within 1 to 2 seconds of contact. This surface temperature is specifically what produces the immediate, dramatic Maillard reaction on the beef’s cold surface.
At full high heat, the Blackstone griddle surface typically reaches 450 to 500 degrees F. At this temperature, when cold beef (at refrigerator temperature, about 38 degrees F) makes contact, the temperature differential of 400+ degrees produces immediate and rapid protein and fat chemistry at the contact surface. The fat renders within seconds. The surface proteins and sugars denature and caramelize. This is specifically the mechanism that produces the deeply browned, caramelized, lacey-edged crust that defines a properly executed smash burger.
At a lower griddle temperature (say, medium heat at 350 degrees F), the same beef balls would produce less caramelization and more steaming as the beef’s own moisture can’t evaporate fast enough. The lower temperature produces a less specifically caramelized result. Maximum heat is specifically required for the maximum Maillard reaction that makes smash burgers what they are.
Callie’s Kitchen Note: The first time I made smash burgers, I used medium-high heat because high heat felt aggressive and I was worried about burning them. The result was technically cooked burgers with some browning. The second time I turned the griddle to its highest setting and let it fully preheat before anything went on. The immediate sizzle when the cold beef ball hit the surface was specifically more dramatic – a loud, sustained sizzle rather than just a quiet hiss. The caramelization that formed in 2 minutes was specifically darker, more developed, and more complex in flavor than the first batch. High heat is non-negotiable for proper smash burgers. Use all of it.
Smashing, Seasoning, and the One-Flip Discipline
Remove the cold beef balls from the refrigerator immediately before cooking. Working with 2 to 4 balls at a time depending on your griddle’s size (maintain space between each), place a beef ball on the hot griddle. Immediately cover it with a square of parchment paper (about 4 inches square) cut from a roll. Using a heavy metal spatula – one with a broad, thin, flat blade – place the spatula‘s flat surface on the parchment paper covering the beef ball and press down firmly with your body weight. Apply sustained, even pressure for 5 to 10 seconds until the ball has flattened to approximately quarter-inch thickness. The parchment prevents the beef from sticking to the spatula during smashing.
Remove the parchment paper. Season the flattened patty immediately with kosher salt and a few grinds of black pepper. If using smash sauce in the patty (as referenced in the original recipe), a small spoon of sauce can be spread across the surface at this stage – the heat caramelizes the sauce’s sugars slightly and incorporates it into the crust.
Now leave the patty alone. Don’t press it again. Don’t move it. Don’t adjust it. The 2 to 3 minutes of undisturbed contact with the hot griddle surface is when the caramelized crust develops. You’ll see the edges of the patty turn deeply golden-brown and the fat visibly bubbling and pooling around the perimeter. When the edges look specifically deeply caramelized and the fat is bubbling through visible holes in the patty’s surface, the first side is ready.
Callie’s Kitchen Note: The one-flip discipline is the hardest habit to develop when you’re used to tending burgers on a grill. Every cooking instinct says to check, adjust, peek, press a little more. Resist all of it. The smash burger’s caramelized crust develops through sustained, uninterrupted contact with the hot surface. Any movement disrupts the developing crust and the fat pooling that’s happening at the patty’s edges. I set a 2-minute timer after smashing and walk away from the griddle. When the timer goes, I look at the edges – if they’re deeply golden-brown, I flip. If not, 30 more seconds. Then flip. Then cheese. Done.
Flipping, Cheese, and the Double Stack
Using a thin metal spatula, scrape firmly under each patty to release the crust from the griddle surface. The scraping motion is important – the crust is bonded to the griddle surface and requires active lifting rather than just sliding the spatula under the patty. Flip each patty in one decisive motion.
Immediately place one slice of cheddar on each patty. Cook for 30 to 60 more seconds – just long enough for the second side to develop some color and the cheese to begin melting from the patty’s heat below. Remove from the griddle.
For double patties: immediately stack two patties together (cheese-side in, against each other) so the two cheese slices are in the center of the double stack. The patties’ residual heat melts both cheese slices together into a unified, specifically molten cheese layer between the patties. Let the stacked double patty rest on the cutting board for 30 seconds while you finish assembling the buns.
Toasting the Buns and Final Assembly
The buns should have been toasted on the griddle’s cooler zone while the patties were cooking – butter the cut surfaces and place cut-side-down on a medium-heat area of the griddle for 60 to 90 seconds until golden. Toasted buns are specifically the texture upgrade that prevents the bun from immediately becoming soggy from the patty’s fat and the sauce’s moisture – the toasted surface creates a brief barrier.
Smear a generous amount of smash sauce on both the bottom and top bun cut surfaces. On the bottom bun: a layer of shredded iceberg lettuce, then the double patty stack, then a thin slice of red onion, then a slice or two of vine-ripe tomato, then 4 pickle chips. Cap with the top bun. Serve immediately – smash burgers don’t hold well and are specifically at their best in the 2 to 3 minutes after assembly.
Speed Hacks for Cookout-Scale Efficiency
- Form all the beef balls the morning before the cookout and keep refrigerated – day-of is just heat, smash, flip, assemble
- Make the smash sauce up to a week ahead and refrigerate in a sealed jar
- Prep all toppings and set up a topping station while the griddle heats – the entire cooking process is less than 10 minutes once the griddle is hot, so everything needs to be ready
- For a crowd of 8 or more: work in coordinated waves of 4 patties at a time, stacking double patties as they come off and assembling while the next wave cooks
Common Mistakes To Avoid
Smash burgers have a specific technique that produces their characteristic result and a few specific mistakes that prevent it.
Not preheating the griddle to maximum temperature. Medium heat produces cooked burgers with mild browning. Maximum heat produces the specific, deep, caramelized crust that defines smash burgers. Full preheat for 3 to 5 minutes on the highest setting is specifically required.
Using room-temperature beef. Cold beef balls from the refrigerator smash more controllably and produce more dramatic caramelization from the greater temperature differential with the hot griddle. Form and refrigerate the balls until the moment they go on the griddle.
Using lean beef (90/10 or higher). The fat in 80/20 beef renders on contact and enables the caramelized crust and juicy interior. Lean beef doesn’t render enough fat and produces drier, less specifically caramelized patties.
Moving or pressing the patties after the initial smash. The crust develops from undisturbed contact. Any movement before the first flip disrupts the developing crust. Leave them completely alone for the full 2 to 3 minutes.
Flipping multiple times. One flip is the discipline. Each additional flip disrupts a developing crust on each side. Flip once, add cheese, remove from heat.
Not scraping the patties firmly from the griddle surface. The crust bonds to the griddle during searing. A tentative spatula that slides rather than scrapes tears the crust apart and leaves half of it on the griddle. Use a thin metal spatula with a firm scraping motion to release each patty cleanly.
Storage and Reheating
Smash burgers are specifically designed to be eaten immediately. The caramelized crust, the cold-warm temperature contrast of the toppings against the hot patties, and the soft-crispy-juicy textural balance all degrade quickly after assembly. They’re specifically at their best in the 2 to 3 minutes after plating.
Cooked patties without toppings – fridge up to 3 days: Wrap tightly in foil and refrigerate. Reheat in a dry skillet over medium heat for 2 minutes per side rather than microwaving – the microwave produces steam that destroys the crust, while the skillet preserves and partially restores it. Add a splash of water and cover briefly for the last 30 seconds to re-melt the cheese.
The leftover smash burger use that’s specifically worth having: Cold smash burger patties (the day after cooking, from the refrigerator) broken up and heated in a skillet, then served as a topping over a bowl of mac and cheese or over fries with extra cheese and smash sauce, is a genuinely excellent repurposing of leftover smash burger components that some family members specifically look forward to more than the original burger.
Blackstone Smash Burger Variations
The double-smash format takes several excellent flavor directions.
Smash Burger with Caramelized Onions: While the griddle is fully heated, place a generous handful of thinly sliced yellow onion on a medium-heat zone with a tablespoon of butter. Stir occasionally as the onions cook slowly over 10 to 12 minutes until deeply golden and specifically sweet. Pile the caramelized onions on the double patty before capping with the top bun. The sweet-savory caramelized onion against the beef’s Maillard-browned depth is a specifically excellent combination.
Green Chile Smash Burger: Top each patty with a spoonful of canned fire-roasted green chiles (Hatch brand is the best quality) before adding the cheese. The chiles’ mild heat and specifically roasted, earthy-sweet flavor alongside the cheddar and the beef’s richness is the direction that produces a specifically Southwestern-inspired smash burger that is genuinely excellent with guacamole replacing the smash sauce.
Mushroom and Swiss Smash Burger: Sauté 8 ounces of sliced cremini mushrooms in butter with a pinch of thyme on the Blackstone’s medium zone until deeply golden and their moisture has fully evaporated. Replace the cheddar with Swiss cheese. Replace the smash sauce with a simple horseradish mayo (mayo and prepared horseradish in equal parts). The mushrooms, Swiss, and horseradish together produce a specifically more complex, more umami-forward direction.
Oklahoma Onion Smash Burger: The classic Oklahoma onion burger technique: place a small mountain of thinly sliced raw white onion on the hot griddle, place a beef ball on top of the onion, and smash the beef ball down into and through the onion layer. The onion cooks between the beef and the griddle surface, steaming and caramelizing simultaneously against the beef. The result is a patty with onion specifically pressed into and integrated with the beef’s surface rather than sitting on top as a separate topping.
Serving Suggestions
These Blackstone smash burgers are specifically designed for outdoor gatherings, cookouts, and any occasion where a great burger is the centerpiece.
For a summer cookout spread: Set up a toppings station with all the components in bowls – shredded lettuce, tomato slices, onion, pickles, smash sauce, hot sauce, any variations – and let guests assemble their own from the hot patties coming off the griddle. This format is specifically designed for the simultaneous cooking and serving rhythm that a Blackstone griddle enables. The cook works the griddle continuously while guests rotate through the topping station.
With classic cookout sides: Sweet potato fries or thin-cut shoestring fries, corn on the cob with butter and flaky salt, coleslaw with apple cider vinaigrette, and sliced watermelon are the most specifically complementary, most complete cookout accompaniments for smash burgers. The fries specifically for dipping in the extra smash sauce.
For a weeknight family dinner in under 30 minutes: The Blackstone smash burger is one of the fastest hot dinners available from a cold start. 3 minutes of prep, 5 minutes of griddle preheat, 8 minutes of cooking, 3 minutes of assembly. No other weeknight protein delivers this specific combination of speed and quality result.
Beverage pairings: A cold lager or pilsner is the most specifically appropriate beer for smash burgers – the lager’s crisp, light, slightly bitter quality cuts through the burger’s fat and richness and refreshes between bites. A cherry cola or root beer provides the specifically classic American diner reference that smash burgers evoke. A cold glass of full-fat whole milk is the most specifically nostalgic, most genuinely satisfying non-alcoholic accompaniment for a great burger.

Blackstone Smash Burger FAQ
A smash burger is specifically defined by the technique: a ball of cold ground beef is placed on a screaming-hot flat cooking surface and immediately pressed (smashed) flat to a thin, wide patty. This technique differs from a traditional formed patty burger in several specific ways. First, the cooking surface: smash burgers require a flat griddle (Blackstone, cast iron skillet, or flat-top grill) rather than a grill with grates – grates don’t allow the full-surface contact required for the technique. Second, the fat content: 80/20 beef is specifically the requirement since the high fat content enables the caramelized crust. Third, the technique: the immediate smash maximizes direct beef-to-surface contact, which produces maximum Maillard reaction across the entire patty surface. A traditional burger formed into a patty has far less total browning per ounce of beef than a properly smashed burger. The specific result is a burger that is almost entirely crust – the ratio of caramelized, Maillard-flavored exterior to plain interior is much higher in a smash burger than in a thick patty.
A cast iron skillet is specifically an excellent alternative to the Blackstone for smash burgers – and many argue that a properly seasoned, thoroughly preheated 12-inch cast iron skillet produces the best smash burgers because it retains heat exceptionally well and doesn’t lose temperature when cold beef is added. The limitation is size: a 12-inch skillet fits 2 to 3 patties at a time, requiring multiple batches. The Blackstone’s advantage is cooking area – its large flat surface can accommodate all 8 patties simultaneously, making it specifically more practical for feeding a group. For a weeknight dinner for 2, a cast iron skillet is specifically excellent. For a cookout for 6 to 8 people, the Blackstone’s cooking capacity is specifically the advantage that makes the format practical.
Not crispy smash burgers come from one of three causes. First and most common: the cooking surface wasn’t hot enough. Smash burgers specifically require maximum griddle temperature. Medium heat produces cooked, pale burgers; maximum heat produces the specific dark, caramelized crust. Second: the beef wasn’t smashed thin enough. A half-inch patty doesn’t have enough surface-area-to-mass ratio to produce the lacy, crispy edges of a quarter-inch patty. Press harder and longer during the smash, aiming for quarter-inch maximum thickness. Third: the beef’s fat content was too low. 80/20 is specifically required for the fat rendering that enables caramelization. Lean beef produces steamed, pale patties regardless of heat level.
A heavy, broad, flat metal spatula with a stiff blade is specifically the right tool. Flexible or thin-bladed spatulas flex under pressure and distribute force unevenly rather than applying uniform pressure across the whole patty surface. A smash burger press (a specific tool designed for this purpose, available online and at kitchen stores for about $20) is the most specifically effective tool and worth buying if you make smash burgers regularly. In the absence of a press, a flat-bottomed heavy saucepan or cast iron press weight applied over the parchment paper while pressing with your body weight on the spatula handle also works. The key requirement: a rigid, flat surface that applies even, full-coverage pressure across the entire patty surface simultaneously.
Recipes You May Like
If these Blackstone smash burgers have become a summer cookout staple, here are three more outdoor cooking and quick weeknight beef dinner recipes worth having alongside them:
- Garlic Butter Steak Bites and Potatoes – For the weeknights when you want the same quick, hot-surface, high-heat beef direction from the Blackstone or a cast iron skillet in a steak-and-potatoes format rather than burger format. Both produce seared beef with maximum Maillard character from direct high heat.
- Grilled Bison Ribeye Steaks – For the cookout occasions when you want to move from the Blackstone flat top to the open grill grates with a more specifically special-occasion beef cut. Both the smash burgers and the bison ribeye celebrate beef’s specific greatness with different techniques and different occasion-appropriateness.
- BBQ Meatloaf – For the indoor weeknight dinner when you want the same deeply savory, caramelized beef character from the smash burgers in a slow-oven format. Both celebrate 80/20 ground beef’s natural richness; one through maximum heat and Maillard reaction, one through a long oven session and caramelized BBQ glaze.
Conclusion
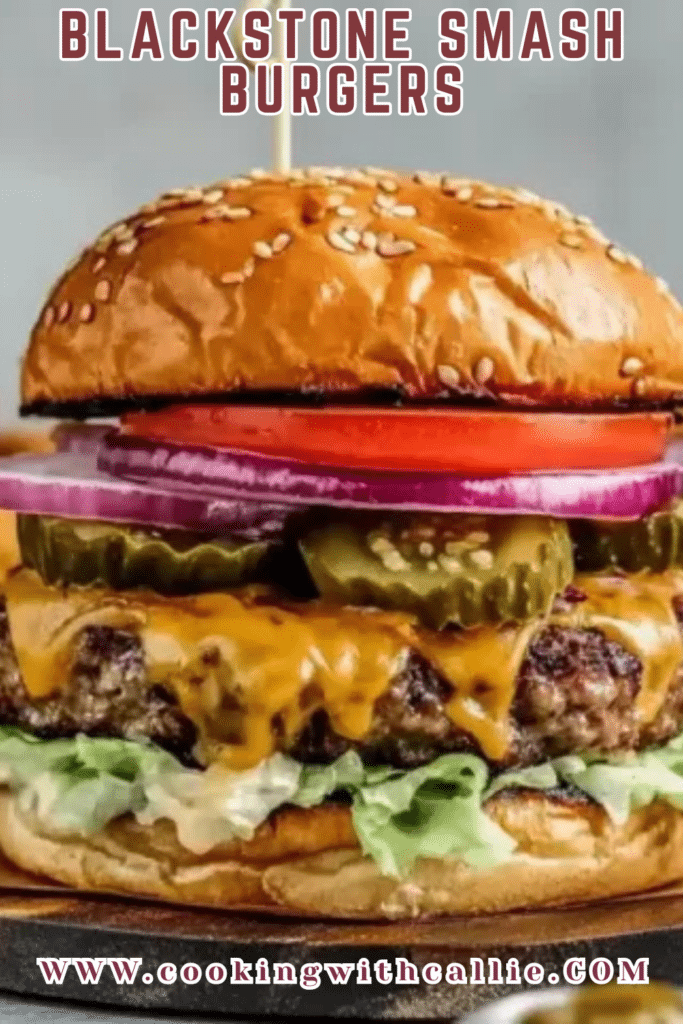
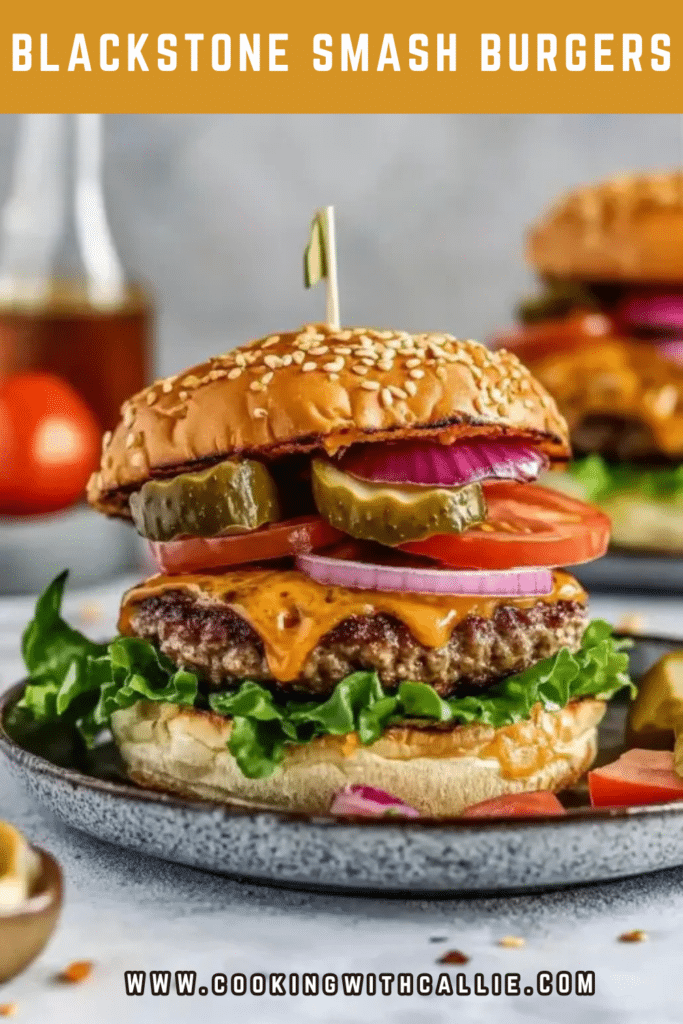
These Blackstone smash burgers are the cookout recipe that specifically earns “better than any restaurant version I’ve had” – because the combination of cold beef, screaming-hot griddle surface, immediate smashing to maximum thinness, and completely undisturbed 2 to 3 minute sear produces the specific Maillard reaction intensity that most home cooking never achieves. Deeply caramelized, lacey-edged crust. Juicy center. Melty cheddar. Smash sauce. Buttered toasted bun.
Form loose beef balls and keep cold. Preheat the griddle to maximum – wait for it. Smash flat to quarter inch immediately on contact. Season. Don’t touch them for 2 to 3 minutes. Scrape and flip once. Add cheese. Stack into doubles. Assemble and serve immediately. These seven things produce smash burgers that are specifically worth firing up the Blackstone for every summer, and that my husband specifically claims are worth flying home for from any city he’s in when I text that we’re making them. Come back and tell me in the comments whether you tried the caramelized onion direction or the Oklahoma onion smash technique. And save this on Pinterest for every future summer cookout where you want to serve the one thing everyone remembers.
Happy cooking, friends!
Callie
Blackstone Smash Burgers

Blackstone smash burgers are packed with bold flavor, featuring crispy caramelized edges, juicy centers, melty cheddar, and fresh toppings. Perfectly smashed on a hot griddle, these burgers bring a mouthwatering sizzle to any weeknight dinner or weekend cookout.
- Prep Time: 20 minutes
- Cook Time: 5 minutes
- Total Time: 25 minutes
- Yield: 4 smash burgers 1x
- Category: Dinner
- Method: Griddled
- Cuisine: American
- Diet: Kosher
Ingredients
1 ½ pounds ground beef 80/20
Kosher salt to taste
Ground black pepper to taste
2 tablespoons butter at room temperature
8 slices medium cheddar cheese
2 cups shredded iceberg lettuce
4 slices red onion
4 to 8 slices vine-ripe tomatoes
16 bread and butter pickle chips or dill pickles
4 hamburger buns
Smash burger sauce
Instructions
- Divide ground beef into 8 loose balls and place on a parchment-lined tray
- Cover and refrigerate until ready to cook
- Shred lettuce and slice tomato and red onion
- Butter the buns and toast on medium heat until golden
- Heat the griddle on high
- Place beef balls on hot griddle and top each with parchment paper
- Smash down into ¼-inch patties
- Season with salt pepper and a spoonful of sauce
- Cook 2 to 3 minutes until edges are crisp and fat bubbles
- Flip with a metal spatula and top with cheese
- Stack into double burgers and remove from heat
- Assemble burgers with sauce lettuce patties onion tomato pickles and top bun
- Serve hot and enjoy


Notes
- Keep meat cold before cooking to maintain juiciness
- Use parchment paper to prevent sticking when smashing
- Don’t overcrowd the griddle—give each patty space to crisp
- Stack patties while still hot for melty cheesy goodness
Nutrition
- Serving Size: 1 burger
- Calories: 620
- Sugar: 5g
- Sodium: 980mg
- Fat: 38g
- Saturated Fat: 16g
- Unsaturated Fat: 18g
- Trans Fat: 1g
- Carbohydrates: 26g
- Fiber: 2g
- Protein: 37g
- Cholesterol: 105mg