
This post may contain affiliate links. For more information, see our Affiliate Disclosure Policy.
By Callie
Let me tell you the story of how I accidentally invented the best cake decorating hack I’ve ever used. I was making a layered mermaid cake for my neighbor’s daughter’s party, and the frosting job was going terribly. Like, embarrassingly bad. Uneven patches, crumbs showing through, the works. In a moment of pure desperation, I grabbed a bag of vanilla wafer cookies, crushed them up, and scattered them over the worst parts of the frosting. Then I stepped back and looked at it. It looked like a beach. A beautiful, golden, sandy beach that completely hid my frosting disaster. That happy accident is how this Mermaid Cake With Sand And Seashells was born, and it’s been one of my most requested recipes ever since.
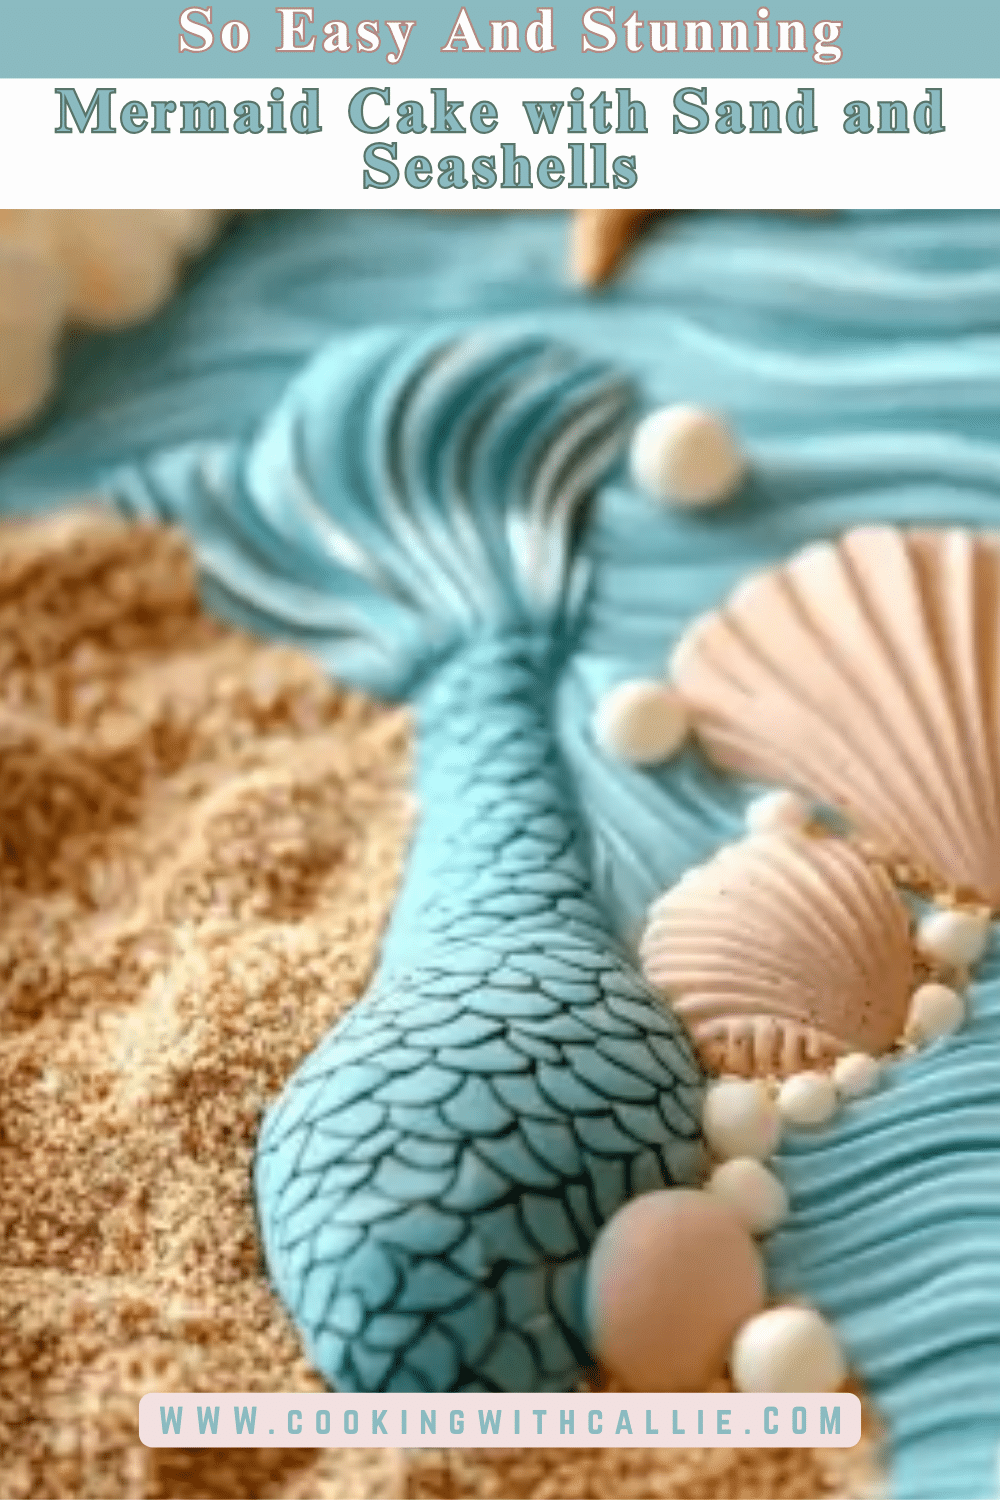
This cake is everything a mermaid-themed party needs, and it’s built on a simple 9×13 sheet cake, which means no stacking, no leveling, and no prayers that your layers don’t slide. You frost it with swirled blue and teal buttercream frosting that looks like ocean water, scatter crushed cookie “sand” across one side, and then top it all off with handmade fondant seashells, a little mermaid tail, and edible pearl sprinkles. The finished cake looks like a tiny underwater world sitting on your dessert table, and the best part? It’s one of the most beginner-friendly decorated cakes I’ve ever made.

Whether you’re throwing a mermaid birthday party, hosting a beach-themed baby shower, or you just want to make something that’ll get your whole family excited about dessert, this is your cake. The sheet cake format means it feeds a crowd without any of the structural stress of a tiered cake, and you can pull the whole thing together in an afternoon.
If you’re already comfortable with tiered cakes and want something with a bit more height, my Purple And Blue Buttercream Mermaid Scales Cake (https://cookingwithcallie.com/purple-and-blue-buttercream-mermaid-scales-cake/) is a gorgeous next-level option that uses similar ocean colors.
Let’s make some magic.
Why You Will Like This Mermaid Cake With Sand And Seashells
- It’s the easiest “wow” cake I know – No cake decorating experience needed. If you can spread frosting and crush cookies, you can make this cake look like it came from a professional bakery.
- It’s a sheet cake, so no stacking or leveling – This is a huge deal if you’ve ever had a layered cake lean sideways on you. One pan, one flat surface, zero structural anxiety.
- The “sand” hides imperfect frosting – Honestly? This is the most forgiving decorated cake out there. Cookie crumb sand covers any bumps, streaks, or thin spots in your frosting. It’s basically a built-in safety net.
- Perfect for mermaid and beach parties – Kids go wild for it. Adults photograph it. Everyone asks how you made the sand look so real.
- Feeds a big crowd – A 9×13 sheet cake easily gives you 20-24 slices, which is plenty for a birthday party or large gathering.
- The cookie crumbs add incredible texture – That crunch of vanilla wafer against the soft cake and smooth buttercream is a combination people don’t expect and immediately love.
- Totally customizable – Swap the colors, change the cookie type, add different fondant shapes. You can make this cake fit any ocean or tropical theme you want.
- Kids can help decorate – My daughter loves pressing the seashells into the frosting and sprinkling the pearl sprinkles. It’s a great activity to do together.
Mermaid Cake With Sand And Seashells Ingredients
For the Cake
- 2 1/2 cups all-purpose flour (or a 1:1 gluten-free flour blend)
- 2 1/2 teaspoons baking powder
- 1/2 teaspoon salt
- 1 cup unsalted butter, softened to room temperature – Give this at least 45 minutes out of the fridge. Room temperature butter creams with sugar properly and gives the cake that light, tender crumb. If it’s still cold, your batter will be lumpy and the cake will bake dense.
- 1 3/4 cups granulated sugar
- 4 large eggs (or flax eggs for vegan – 4 tablespoons ground flaxseed mixed with 12 tablespoons water, rested 5 minutes)
- 2 teaspoons pure vanilla extract
- 1 cup whole milk (almond milk or oat milk for dairy-free)
For the Buttercream Frosting
- 1 cup unsalted butter, softened to room temperature
- 4 cups powdered sugar, sifted – Sifting is what gives you that smooth, lump-free consistency. Five minutes of sifting saves you from gritty frosting.
- 2-3 tablespoons heavy cream (or full-fat coconut cream for dairy-free)
- 1 teaspoon vanilla extract
- Gel food coloring in blue and teal
For the Decorations
- 1 1/2 cups crushed vanilla wafer cookies – Nilla Wafers are my go-to, but any vanilla-flavored cookie works. Graham crackers are a good backup if you can’t find wafers.
- Fondant in pastel colors – purple, teal, and pink for seashells and the mermaid tail
- Edible pearl sprinkles
- Gold luster dust (optional, but it makes the seashells look stunning)
Callie’s Kitchen Note: I’ve tested a bunch of different cookies for the “sand” and vanilla wafers win every time. Graham crackers work in a pinch, but they’re darker and the sand looks more brown than golden. Golden Oreo crumbs are another option that gives a nice light color. Whatever you use, crush them in a sealed plastic bag with a rolling pin rather than a food processor – the processor turns them into powder, but you want some slightly larger pieces mixed in for a more realistic sandy texture.
How To Make Mermaid Cake With Sand And Seashells
This is one of my “Quick Fix” decorated cakes – you can realistically pull this together in a single afternoon. If you want to spread it out, bake the cake and make the fondant decorations one day, then frost and decorate the next. But honestly, even doing it all at once is totally manageable.
Preparing and Baking the Sheet Cake
- Preheat your oven to 350 degrees F (175 degrees C). Grease a 9×13-inch sheet cake pan with butter and line the bottom with parchment paper. The parchment is your insurance policy – even if the butter isn’t perfectly applied, the cake lifts right out.
- In a medium bowl, whisk together the flour, baking powder, and salt. This quick step distributes the leavening evenly through the flour so every part of your cake rises consistently.
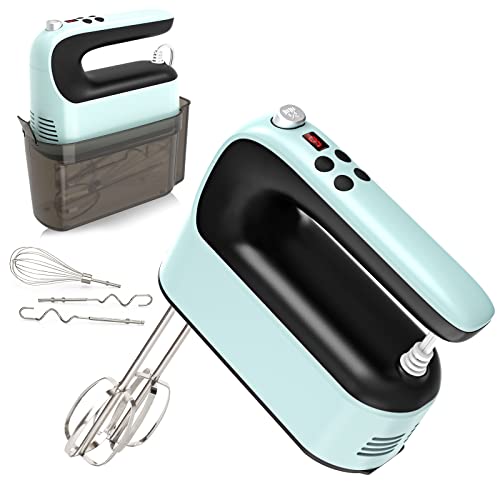
- In a large bowl, cream the butter and sugar together with an electric mixer on medium speed for about 3-4 minutes. You’ll know it’s ready when the mixture turns from yellow to very pale and looks fluffy. This is called creaming, and it’s what traps air in the batter and gives you a light, soft cake.
- Beat in the eggs one at a time, mixing well after each addition. Then stir in the vanilla extract.
- Alternate adding the dry ingredients and milk, starting and ending with the dry mixture. About three additions of dry and two of milk. Mix on low speed and stop the moment the streaks of flour disappear. Over-mixing once the flour is in develops gluten, which turns your tender cake into something chewy and tough.
- Pour the batter into your prepared pan and spread it evenly with a spatula or the back of a spoon.
- Bake for 30-35 minutes, or until a toothpick inserted in the center comes out clean and the top springs back when you gently press it. Start checking at 28 minutes – every oven is a little different.
- Let the cake cool in the pan for 15 minutes, then either flip it out onto a cooling rack or leave it in the pan to cool completely. Since this is a sheet cake that you’ll likely serve from the pan or a board, you can decorate right in the pan if you prefer.
Callie’s Kitchen Note: Here’s something I wish someone had told me earlier about sheet cakes – the edges bake faster than the center because they’re closer to the hot metal sides of the pan. If your cake comes out with slightly dry or dark edges but a perfectly moist center, wrap the outside of your pan with dampened cake strips (or a folded damp towel secured with foil) before baking. This insulates the edges and gives you a much more even bake. Game changer.
Making the Buttercream Frosting
- Beat the softened butter in a large bowl with an electric mixer on medium speed for about 2 minutes until it’s smooth and creamy.
- Gradually add the sifted powdered sugar, about a cup at a time, mixing on low speed after each addition. Low speed prevents the powdered sugar explosion that coats your entire kitchen.
- Add the vanilla extract and heavy cream, then increase the speed to medium-high and whip for 3-4 minutes until the frosting is fluffy and smooth.
- Divide the frosting roughly in half between two bowls. Tint one bowl blue and the other teal using gel food coloring. Add the coloring a drop at a time – you want ocean colors, not neon. You can also leave a small portion uncolored if you want white “foam” accents.
Frosting and Creating the Ocean Effect
- Make sure your cake is completely cool before you touch it with frosting. Warm cake will melt the buttercream on contact and you’ll end up with a soupy, sliding mess.
- Drop alternating dollops of blue and teal frosting all over the top of the cake. Don’t try to be neat about it – random placement is actually better for the ocean effect.
- Use an offset spatula or the back of a large spoon to swirl and spread the two colors together. Don’t blend them completely – you want streaks of blue and teal mixing together with pockets of each individual color still visible. Think of how real ocean water looks from above, with lighter and darker patches.
- Create wave texture by pressing the flat side of the spatula into the frosting and lifting it to create small peaks and ridges. Focus this texture on the “water” side of the cake (opposite from where the sand will go).
Adding the Sand and Decorations
- Decide which section of the cake will be the “beach.” I usually do about one-third of the cake as sand and two-thirds as ocean, but go with whatever looks right to you.
- Sprinkle the crushed vanilla wafer cookies generously over the beach section, starting at the edge and working inward. Let some of the crumbs trail into the frosting at the border – this creates a really natural-looking shoreline where the sand meets the water.
- Place your fondant seashells and mermaid tail along the border between the sand and ocean, and scatter a few in the water as well. Press them gently into the frosting so they stick.
- Add edible pearl sprinkles scattered around the seashells and along the shoreline.
- If using gold luster dust, brush a light coating onto the seashells and the mermaid tail with a clean, dry brush. This makes the fondant pieces catch the light and look almost metallic.
Callie’s Kitchen Note: The first time I made the fondant mermaid tail for this cake, it was way too big and it looked silly sitting on top of a flat sheet cake. For a 9×13 sheet cake, keep your mermaid tail about 3-4 inches tall. Anything bigger overwhelms the proportions. I also learned to let the tail dry for at least a few hours (or overnight) before placing it on the cake – a soft, floppy tail doesn’t stand up on its own and just lays flat on the frosting. Propping it against a toothpick pressed into the cake at an angle gives it that “diving into the ocean” look.

Common Mistakes To Avoid
This is a forgiving cake, but there are still a few pitfalls I’ve hit over the years. Here’s what to watch out for.
Decorating before the cake is fully cooled. This is the universal cake decorating rule that people want to skip every single time. Your cake needs to be room temperature – not warm, not “mostly cool.” Warm cake plus buttercream equals melted frosting that slides around and refuses to hold any shape or texture.
Over-blending the blue and teal frosting. The beauty of the ocean effect is the contrast between the two colors. If you blend too much, you end up with one flat teal color instead of a dynamic, swirled ocean. A few quick strokes with the spatula is all you need.
Using too-fine cookie crumbs for the sand. If you process the cookies into a fine powder, the “sand” looks uniform and unrealistic. You want a mix of fine crumbs and slightly larger pieces – the variation in size is what makes it look like actual beach sand. Crush by hand or with a rolling pin, not a food processor.
Making fondant decorations too far in advance in humid conditions. Fondant absorbs moisture from the air, so if you make your seashells and tail a week ahead in a humid kitchen, they might get soft and lose their shape. In moderate conditions, 2-3 days ahead is fine. In high humidity, make them the day before or the morning of.
Forgetting to support the mermaid tail. A fondant tail that’s just pressed into frosting on a flat sheet cake will slowly lean and eventually fall over, especially if the frosting is soft. Insert a toothpick or small skewer at an angle and prop the tail against it for support.
Storage And Reheating
Room temperature storage: Keep the Mermaid Cake With Sand And Seashells covered loosely with plastic wrap or under a cake dome at room temperature for up to 2 days. The buttercream acts as a moisture seal that keeps the cake soft. The cookie crumb “sand” will stay crunchy for about 24 hours – after that it starts to soften as it absorbs moisture from the frosting, but it still tastes great.
Refrigerator storage: Store covered in the fridge for up to 5 days. The frosting will firm up in the cold, so let the cake sit at room temperature for 20-30 minutes before serving. The fondant decorations may develop a slight tackiness from condensation, but it fades as the cake warms up.
Freezing the unfrosted cake: Wrap the cooled, unfrosted sheet cake tightly in plastic wrap and then aluminum foil. It’ll keep in the freezer for up to 3 months. Thaw overnight in the fridge, then bring to room temperature before frosting and decorating.
Freezing frosted slices: Individual slices can be wrapped in plastic wrap and stored in freezer-safe containers for up to 2 months. The cookie crumb sand will soften after thawing, but the cake and frosting taste just fine.
Make-ahead timeline: Bake the cake up to 2 days ahead and store it wrapped in the fridge. Make fondant decorations 2-3 days ahead and store at room temperature in an airtight container. Frost and decorate the morning of your event for the freshest look. Crush your cookies ahead of time too – they keep indefinitely in a sealed bag.
For food safety with dairy-based buttercream, the USDA recommends that it not sit unrefrigerated for more than 2 hours in warm environments (https://www.usda.gov). Keep the cake inside or in the shade if serving at an outdoor party.
Mermaid Cake With Sand And Seashells Variations
Chocolate ocean cake: Use a chocolate cake recipe instead of vanilla. The dark cake peeking through the blue and teal frosting looks dramatic, and the combination of chocolate cake with vanilla wafer sand is surprisingly addictive.
Coconut beach version: Add 1/2 cup of sweetened shredded coconut to the batter and use coconut extract instead of vanilla in both the cake and frosting. Toast extra coconut flakes and scatter them over the sand section for added texture and a tropical flavor that matches the beach theme perfectly.
Funfetti ocean floor: Fold rainbow sprinkles into the vanilla batter before baking. When guests cut into the cake, the colorful specks look like hidden treasures beneath the ocean surface. Kids love this version.
Red velvet under the sea: Swap the vanilla cake for red velvet. The bright red layers showing when the cake is sliced create a striking contrast against the blue frosting and golden sand. My cousin made this for her daughter’s pirate-mermaid combo party and the kids were obsessed.
Gluten-free version: Use a 1:1 gluten-free flour blend for the cake and gluten-free vanilla wafer cookies (Kinnikinnick makes good ones) for the sand. I’ve tested this combination twice and the results were practically identical to the original.
Vegan mermaid cake: Replace butter with vegan butter, use oat milk, and swap eggs for flax eggs. For the frosting, use vegan butter and coconut cream instead of heavy cream. The texture is just slightly denser, but frosted and decorated, nobody can tell.
Ice cream sheet cake version: Bake the cake, let it cool, and spread a layer of vanilla or blue raspberry ice cream on top instead of buttercream. Freeze until firm, then quickly add your sand, shells, and decorations. Keep frozen until serving. This version is incredible for summer parties.
Serving Suggestions
Presentation: Serve the cake right in the pan lined with blue tissue paper peeking over the edges, or transfer it to a large cutting board or serving platter. Scatter a few extra cookie crumbs and pearl sprinkles on the serving surface around the cake for a finished look. A couple of real (clean, food-safe) seashells placed on the table next to the cake ties the whole theme together.
Party pairings: Pair with lighter sides that fit the beach vibe. A tropical fruit salad with mango, pineapple, and kiwi is a refreshing contrast to the sweet buttercream. My Old-Fashioned Southern Tea Cakes (https://cookingwithcallie.com/southern-tea-cakes-recipe-a-classic-buttery-delight/) arranged on a shell-shaped platter make a charming addition to the dessert table.
For a full mermaid party spread, add blue Jello cups with gummy fish, “ocean water” punch made with blue lemonade and sparkling water, and pretzel rod “driftwood” dipped in white chocolate. The cake anchors the whole table and the smaller treats fill in around it.
Beverage pairings: Coconut lemonade is the obvious match – the tropical sweetness plays off the vanilla cake beautifully. A tropical fruit punch with pineapple juice, orange juice, and sparkling water works great for kids’ parties. For adult celebrations, a light moscato or sparkling rose pairs nicely without competing with the buttercream.
Slicing tip: For clean slices, use a large sharp knife and wipe the blade with a warm damp towel between each cut. Cut the ocean side first (frosting only), then cut through the sand side. This prevents cookie crumbs from getting dragged through the blue frosting.
Callie’s Kitchen Note: I once served this cake at an outdoor pool party in July and the Texas heat was brutal. The frosting started getting soft within about 15 minutes. Now for outdoor events, I keep the cake inside until we’re ready to sing Happy Birthday, carry it out for photos and candles, and then bring it right back inside to slice and serve. The whole outdoor portion takes about five minutes, which is short enough that the frosting holds up fine.
Mermaid Cake With Sand And Seashells FAQ
You absolutely can, and it works great. A standard vanilla or white cake mix, prepared according to the box directions, bakes perfectly in a 9×13 pan. If you want to give a boxed mix a homemade boost, add an extra egg yolk, swap the water for whole milk, and use melted butter instead of oil. These three small changes give boxed cake mix a richer, more homemade flavor and texture.
I’ve used Duncan Hines and Betty Crocker with equal success. The important thing is that the cake is moist and holds up under the frosting and cookie crumbs. Both brands do that well.
No problem at all. There are several alternatives that look just as charming. White chocolate or candy melt seashells are my top recommendation – just melt the chocolate, pour it into a silicone seashell mold, let it set, and pop them out. They taste better than fondant and look equally pretty.
You can also find pre-made candy seashells at most baking supply stores and on Amazon. These are usually made from sugar and come in beautiful pastel colors. Another option is to pipe buttercream seashell shapes using a shell piping tip – they won’t be as defined as fondant, but they blend into the overall ocean look nicely.
A dry sheet cake usually comes down to one of three things: over-baking, over-mixing, or inaccurate measuring. For over-baking, start checking 2-3 minutes before the minimum time in the recipe. The toothpick test is your best friend – pull the cake the moment the toothpick comes out clean or with just a few moist crumbs (not wet batter).
For over-mixing, remember to mix on low speed once the flour goes in, and stop the second the streaks disappear. For measuring, spoon your flour into the measuring cup and level it with a knife instead of scooping the cup directly into the flour bag, which packs in extra flour and makes the cake dry and dense.
Add more sifted powdered sugar, about 1/4 cup at a time, and beat well after each addition until you reach the right consistency. If you’ve already added a lot of sugar and it’s still runny, the issue might be that your butter was too warm. Pop the entire bowl of frosting in the fridge for 10-15 minutes, then re-whip it. The cold firms everything up and usually fixes the problem immediately.
On the flip side, if your frosting is too stiff and hard to spread, add heavy cream one tablespoon at a time until it loosens up. The ideal spreading consistency is smooth and soft, like thick whipped cream.
The easiest method is to roll out a piece of teal or purple fondant to about 1/4-inch thickness and cut a tail shape freehand with a small knife. I make a basic fish tail outline – wide at the top, narrowing in the middle, then flaring out into two fins at the bottom. Use the back of a butter knife or a toothpick to score scale lines onto the surface.
Let the tail dry for at least 4-6 hours (overnight is better) on a surface lightly dusted with powdered sugar. Once firm, brush it with gold luster dust and edible shimmer for a magical, metallic finish. Insert a toothpick into the base so you can anchor it into the cake at an angle.
If you’d rather not make one, silicone mermaid tail molds work beautifully with candy melts or white chocolate. Fill the mold, let it set completely, pop it out, and dust with shimmer. Takes about 10 minutes of active work.
You can! Divide the batter between two or three 8-inch round cake pans (reduce baking time to 25-28 minutes) and stack them with frosting in between. Frost the outside with the blue and teal ocean swirl, apply the cookie sand on one side from bottom to top, and arrange your seashells and mermaid tail on the “beach” side.
The layered version is more dramatic for a centerpiece, but it requires more frosting and a bit more skill with stacking and smoothing. If you go this route, a crumb coat and 30-minute chill is important for getting clean results. The sheet cake version is definitely the easier path for beginners, but the tiered version looks incredible if you’re up for the challenge.
For tips on Maillard browning and why your cake edges bake differently than the center, the King Arthur Baking website has a great explanation of sheet cake science (https://www.kingarthurbaking.com).
Recipes You May Like
- Purple And Blue Buttercream Mermaid Scales Cake (https://cookingwithcallie.com/purple-and-blue-buttercream-mermaid-scales-cake/) – If you love the ocean colors in this sheet cake and want to try a layered version with a similar color palette, this scales cake is a beautiful step up. It uses piped buttercream scales instead of fondant, so everything on the cake is fully edible.
- Mermaid Number Cake Recipe (https://cookingwithcallie.com/mermaid-number-cake-recipe/) – Another creative mermaid cake option, this one is shaped like a number for birthday celebrations. It uses the same ocean color scheme and seashell decorations, so it pairs perfectly as a companion cake on the dessert table.
- Mermaid Candy Cake (https://cookingwithcallie.com/mermaid-candy-cake-a-sweet-and-magical-treat/) – A fun, candy-loaded mermaid cake that kids absolutely go crazy for. The candy decorations are even easier than fondant, so if you’re looking for the simplest possible mermaid cake, start here.
Conclusion
This Mermaid Cake With Sand And Seashells is proof that you don’t need years of cake decorating experience to make something that looks amazing. The sheet cake format keeps things simple. The cookie crumb sand forgives any frosting imperfections. And the ocean-swirl buttercream with those scattered seashells and pearls comes together into something that genuinely makes people stop and stare.
I think what I love most about this cake is how accessible it is. I’ve had friends who’ve never decorated a cake in their lives text me photos of their version, and every single one looked fantastic. The design is forgiving, the flavors are crowd-pleasing, and the whole thing can come together in an afternoon.
Make it for a birthday. Make it for a pool party. Make it because it’s Tuesday and you want something pretty on your counter. Whatever the reason, I think you’re going to love it.
If you give this cake a try, please share a photo in the comments or tag me on Pinterest. Seeing your creations is honestly the best part of what I do.
Happy baking!
Callie

Mermaid Cake with Sand and Seashells

This Mermaid Cake with Sand and Seashells is a stunning ocean-inspired dessert perfect for birthdays, baby showers, and beach-themed parties! A moist vanilla sheet cake is frosted with dreamy ocean-colored buttercream, decorated with crushed cookie “sand,” and adorned with fondant seashells and a shimmering mermaid tail. The result? A show-stopping, magical cake that’s as fun to make as it is to eat!
- Prep Time: 25 minutes
- Cook Time: 35 minutes
- Total Time: 1 hour
- Yield: 12 servings 1x
- Category: Dessert
- Method: Baking
- Cuisine: American
- Diet: Vegetarian
Ingredients
For the Cake:
- 2 ½ cups all-purpose flour (or gluten-free 1:1 flour)
- 2 ½ tsp baking powder
- ½ tsp salt
- 1 cup unsalted butter, softened
- 1 ¾ cups granulated sugar
- 4 large eggs
- 2 tsp vanilla extract
- 1 cup whole milk (or almond milk for dairy-free)
For the Buttercream Frosting:
- 1 cup unsalted butter, softened
- 4 cups powdered sugar
- 2–3 tbsp heavy cream (or coconut milk for dairy-free)
- 1 tsp vanilla extract
- Blue and teal food coloring
For the Decorations:
- 1 ½ cups crushed vanilla wafer cookies (for the sand effect)
- Fondant in pastel colors (purple, teal, pink)
- Edible pearl sprinkles
- Gold luster dust (optional, for shimmer)
Instructions
-
Preheat & Prep the Batter
Preheat your oven to 350°F (175°C) and grease a 9×13-inch sheet cake pan.
In a bowl, whisk together flour, baking powder, and salt.
In a separate bowl, cream the butter and sugar until light and fluffy.
Beat in the eggs one at a time, then mix in the vanilla extract.
Gradually add the dry ingredients, alternating with the milk, until the batter is smooth. -
Bake the Cake
Pour the batter into the prepared pan and bake for 30-35 minutes or until a toothpick inserted in the center comes out clean.
Let the cake cool completely before frosting. -
Prepare the Buttercream
Beat the butter until creamy, then gradually add powdered sugar.
Mix in the vanilla extract and heavy cream until the frosting reaches a smooth, spreadable consistency.
Divide the frosting into two bowls and tint one blue and the other teal. -
Frost the Cake
Spread the blue and teal buttercream over the cake, blending the colors to create an ocean wave effect. -
Add the Sand and Seashells
Sprinkle crushed vanilla wafer cookies over one section of the cake to resemble sand.
Shape fondant into seashells and a mermaid tail, dusting them with gold luster dust.
Arrange the fondant decorations on the cake and finish with edible pearl sprinkles. -
Serve and Enjoy!
Slice, serve, and enjoy your magical mermaid cake!


Notes
- Make-Ahead Tip: Bake the cake a day ahead and store it in the fridge before decorating.
- Storage: Keep leftovers in an airtight container at room temperature for 2 days or in the fridge for up to 5 days.
- Substitutions: Use dairy-free butter and almond milk for a lactose-free version.
Nutrition
- Serving Size: 1 slice
- Calories: 450 kcal
- Sugar: 42g
- Sodium: 210mg
- Fat: 18g
- Saturated Fat: 11g
- Unsaturated Fat: 5g
- Trans Fat: 0g
- Carbohydrates: 65g
- Fiber: 1g
- Protein: 5g
- Cholesterol: 85mg