
This post may contain affiliate links. For more information, see our Affiliate Disclosure Policy.
By Callie
Let me tell you about the dessert that almost got me in trouble. I brought a batch of these Red Velvet Cake Truffles to my friend’s holiday party, and her mother pulled me aside and whispered, “Where did you order these? They’re gorgeous.” When I told her I made them in my kitchen that morning, she genuinely didn’t believe me. That’s the kind of reaction these truffles get – every single time.
Picture a rich, moist red velvet cake center mixed with tangy cream cheese, rolled into perfect little balls, and dipped in a smooth white chocolate coating. Then they get a drizzle of red-tinted chocolate on top that looks like something out of a candy shop window. They’re bite-sized, they’re beautiful, and they taste like a slice of red velvet cake that got dressed up for a formal event.
These are my go-to for gift giving, holiday dessert tables, Valentine’s Day treats, and anytime I want to show up somewhere with something that makes people say, “You MADE these?!” They also keep beautifully in the fridge for over a week, which means you can make them well ahead of any event.
If you’re in a red velvet mood, you’ll also want to check out my Red Velvet Cake with Cream Cheese Frosting – same gorgeous flavors, just in full cake form.
Why You Will Like This Red Velvet Cake Truffles Recipe
- They look like they came from a fancy candy shop. The white chocolate coating with red drizzle looks incredibly professional. Nobody will believe these are homemade unless you tell them.
- Makes about 30 truffles from one batch. That’s a lot of treats from a single 8-inch cake. Perfect for parties, gift boxes, or stashing in the fridge for whenever the mood strikes.
- The red velvet and cream cheese combo is a classic for a reason. That mildly chocolatey cake mixed with tangy cream cheese, all wrapped in sweet white chocolate – every flavor works together perfectly.
- Seriously impressive for gift giving. Pop these in a cute box with some tissue paper and you’ve got a homemade gift that looks like it cost $40 from a boutique chocolate shop. I make these for teachers, neighbors, and hostess gifts all the time.
- Make-ahead friendly. You can store these in the fridge for up to 10 days or freeze them for up to 3 months. Make a big batch and you’re set for weeks.
- Beginner-friendly despite looking advanced. If you can bake a simple cake, crumble it up, and dip things in melted chocolate, you can make these. That’s really all there is to it.
- Fun to make with kids. My daughter loves the rolling and decorating steps. The dipping is a little messy (okay, a lot messy), but that’s part of the fun. Just make sure the truffles are frozen solid before little hands start handling them.
- Perfect for any occasion. Valentine’s Day, Christmas, baby showers, birthdays, bridal showers, potlucks – I have yet to find an event where these don’t fit right in.

Red Velvet Cake Truffles Ingredients
This recipe has three components: the cake, the truffle filling, and the chocolate coating. Here’s everything you’ll need.
For The Red Velvet Cake:
- 75g unsalted butter – Softened to room temperature so it creams properly with the sugar. Cold butter will leave lumps.
- 165g caster sugar – Caster sugar dissolves faster than granulated, giving you a smoother batter. If you only have granulated, it’ll work – just beat a little longer.
- 2 medium eggs – At room temperature for the best volume and even mixing.
- 1/2 teaspoon red food coloring – I recommend Sugarflair Red Extra for a vibrant color that doesn’t taste bitter. Gel food coloring gives you a much deeper red than liquid drops, and you need less of it.
- 1 teaspoon vanilla extract – The real stuff, not imitation. You’ll taste the difference in the finished truffles.
- 175ml buttermilk – This is what makes the cake so moist and tender. The acidity also reacts with the baking soda to give the cake a nice rise. If you don’t have buttermilk on hand, mix 175ml of milk with 1 tablespoon of lemon juice or white vinegar and let it sit for 5 minutes.
- 20g cocoa powder – Just enough to give a subtle chocolate flavor without overpowering the red velvet character. Red velvet isn’t supposed to taste like a full chocolate cake.
- 200g plain flour – Spoon and level for accuracy. Too much flour makes a dry cake, and dry cake makes crumbly truffles.
- 1/2 teaspoon baking powder
- 1/2 teaspoon bicarbonate of soda
- 1 teaspoon white wine vinegar – This works with the bicarbonate of soda for extra lift and that slightly tangy note that’s classic in red velvet.
Callie’s Kitchen Note: The food coloring you use makes a massive difference. My first batch of these turned out more of a dull brownish-pink because I used regular liquid food coloring from the grocery store. It was embarrassing. I switched to gel food coloring (Sugarflair Red Extra specifically) and the difference was dramatic – a true, deep, vibrant red that stays bright even after baking. You only need about half a teaspoon of gel versus a whole tablespoon of liquid, and it doesn’t affect the taste or texture of the cake at all.
For The Truffle Filling:
- 200g soft cream cheese – Full-fat cream cheese gives the best flavor and texture here. Make sure it’s truly softened – leave it on the counter for at least 30 minutes. Cold cream cheese creates a lumpy filling that won’t roll smoothly into balls.
- 50g icing sugar – Also called powdered sugar or confectioners’ sugar. It dissolves into the cream cheese without any graininess.
For The Decoration:
- 400g white chocolate – Quality matters enormously here since it’s the outer coating of every truffle. Choose a white chocolate that melts smoothly – Callebaut or Lindt are my favorites. Cheap white chocolate can seize up or taste waxy.
- Red food coloring – The same gel coloring you used in the cake. You’ll use a small amount to tint some of the melted white chocolate for the drizzle decoration.

How To Make Red Velvet Cake Truffles
This is a Project Recipe – plan for about 4-5 hours total, though much of that is hands-off waiting time (cooling, freezing, setting). The actual active work is closer to 45 minutes spread across the day.
Why We Freeze The Truffles Before Dipping: Frozen truffle balls hold their shape when they hit the warm melted chocolate. If they’re only chilled, they’ll soften, crack, and fall apart in the chocolate. The freezer step is not optional.
Baking The Red Velvet Cake
- Preheat your oven to 170 degrees C (150 degrees C fan / 340 degrees F). Line an 8-inch (20cm) round cake tin with parchment paper on the bottom and lightly grease the sides.
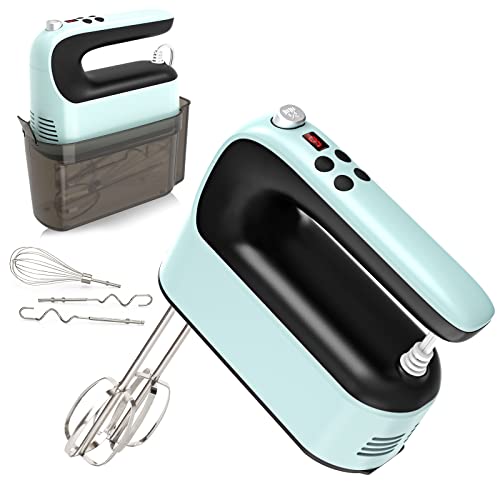
- Cream the butter and caster sugar in a large bowl with an electric mixer until light and fluffy, about 3-4 minutes. The mixture should look pale and airy.
- Add the eggs one at a time, beating well after each addition. Mix in the vanilla extract and red food coloring until the batter is a vibrant, even red color. Scrape down the sides of the bowl to make sure everything is incorporated.
- Sift in the cocoa powder, flour, baking powder, and bicarbonate of soda. Add the buttermilk and white wine vinegar. Mix on low speed until everything is just combined – don’t overmix or the cake will be tough.
- Pour the batter into the prepared tin and smooth the top with a spatula. Bake for 35-40 minutes, or until a toothpick inserted in the center comes out clean. Start checking at 35 minutes – overbaking is the enemy here because a dry cake makes crumbly truffles that won’t hold together.
- Cool the cake completely in the tin for 10 minutes, then turn it out onto a cooling rack and let it cool to room temperature. This takes about an hour. Resist the urge to crumble it while it’s still warm.
Callie’s Kitchen Note: Don’t panic if your cake looks slightly domed or cracked on top. It literally does not matter. You’re about to crumble this entire cake into pieces, so perfection is not the goal here. In fact, this is the perfect recipe for a cake that didn’t rise evenly or sank in the middle – it all gets demolished anyway. I’ve used “failed” cake layers from other baking projects to make truffles, and nobody ever knew.
Making And Rolling The Truffles
- Break the completely cooled cake into a large bowl and crumble it into fine pieces with your hands. You want mostly fine crumbs with a few small chunks – think wet sand texture, not big hunks.
- Add the softened cream cheese and icing sugar to the cake crumbs. Beat with a hand mixer (or a sturdy wooden spoon and some elbow grease) until the mixture is smooth, creamy, and holds together when you squeeze a bit in your hand. It should feel like a thick, moist dough.
- Scoop tablespoon-sized portions and roll them between your palms into smooth balls. I use a small cookie scoop to keep them all the same size, which makes the finished truffles look much more polished and professional. Place each ball on a baking tray lined with parchment paper.
- Freeze the tray for at least 1 hour, or until the balls are frozen solid all the way through. You can press one gently – it should feel rock hard, not soft in the center. If your truffle balls are on the larger side, give them an extra 30 minutes.
Dipping And Decorating
- Melt the white chocolate using either a microwave or a double boiler. For the microwave, chop the chocolate into small pieces and heat in 20-second intervals, stirring between each one, until completely smooth. For a double boiler, set a heatproof bowl over a pot of barely simmering water (make sure the bowl doesn’t touch the water) and stir until melted.
- Dip each frozen truffle into the melted chocolate. I use two forks – drop the truffle in, roll it gently to coat, then lift it out on the fork and tap the fork against the edge of the bowl to let the excess chocolate drip off. Place the coated truffle back on the lined tray.
- Make the red drizzle. Set aside about 2-3 tablespoons of the melted white chocolate in a small bowl and mix in a tiny amount of red gel food coloring until you get a vibrant red. Drizzle this over the white-coated truffles using a fork or a piping bag with the tip cut very small. Work quickly before the chocolate sets.
- Chill the finished truffles in the fridge for at least 30 minutes until the chocolate coating is completely set. Then they’re ready to serve, box up, or snack on.
Common Mistakes To Avoid
Overbaking the cake. A dry cake is the single biggest problem with cake truffles. If the cake is too dry, the mixture won’t bind properly with the cream cheese, and your truffles will be crumbly and hard to roll. Always check your cake a few minutes before the recipe says it should be done. A toothpick should come out clean but not bone dry – a few moist crumbs clinging to it is perfect.
Not freezing the truffles long enough. If your truffle balls are only partially frozen when you dip them, they’ll soften in the warm chocolate, crack, or fall apart entirely. I’ve fished half-dissolved truffles out of a bowl of melted chocolate more than once in my early truffle-making days. A full hour in the freezer minimum. Poke one to check before you start dipping.
Overheating the white chocolate. White chocolate is more temperamental than dark or milk chocolate. It can seize up (turn thick and grainy) if it gets too hot or if even a drop of water gets into the bowl. Heat it slowly in short intervals, and stir constantly. If it does seize, add half a teaspoon of vegetable oil or coconut oil and stir vigorously – this usually brings it back.
Callie’s Kitchen Note: The chocolate dipping step used to stress me out so much. My first few batches looked like something a toddler decorated – lumpy coating, chocolate drips everywhere, truffles that looked nothing like the photos I’d seen online. Then a friend who makes candy told me the secret: work with only 3-4 truffles at a time, keeping the rest in the freezer until you’re ready for them. And don’t try to “fix” the coating once the truffle is on the tray. Just set it down and move on. The drizzle on top covers a multitude of imperfections, and once they’re all on a plate together, they look beautiful regardless.
Using low-quality white chocolate. Cheap white chocolate (the kind that comes in bark form or chips from the baking aisle) often contains palm oil instead of cocoa butter. It doesn’t melt as smoothly, doesn’t taste as good, and gives the truffles a waxy coating. Spend a little more on Callebaut, Lindt, or Ghirardelli white chocolate – it makes a noticeable difference in both texture and flavor.
Storage And Reheating
Refrigerator storage: Store the finished red velvet cake truffles in an airtight container in the fridge for up to 10 days. Layer them between sheets of parchment paper so they don’t stick together. The white chocolate coating keeps the inside moist and fresh for a surprisingly long time. I actually think they taste even better after a day or two in the fridge – the flavors meld together.
Freezing: These freeze beautifully for up to 3 months. Place the finished, coated truffles in a single layer on a parchment-lined tray and freeze until solid. Then transfer to a freezer-safe container or zip-top bag with parchment between layers. Thaw overnight in the fridge before serving. Don’t thaw at room temperature – the condensation can make the white chocolate coating look cloudy.
Serving temperature: These are meant to be served cold, straight from the fridge. Take them out about 5 minutes before serving so they’re not ice-cold but still firm. You definitely do not want to reheat them – the chocolate coating would melt and the filling would get too soft.
Gift storage tip: If you’re making these as gifts, put them in a small box lined with wax paper or parchment. They’ll keep in the fridge at the recipient’s house for over a week, so you can make them several days before giving them away. I always include a little note that says “keep refrigerated” so people know.
For food safety information on storing cream cheese-based desserts, the USDA FoodKeeper App has helpful guidelines.

Red Velvet Cake Truffles Variations
Once you’ve got the basic technique down, try these fun twists:
- Milk Or Dark Chocolate Coating: Swap the white chocolate for milk chocolate or dark chocolate. Dark chocolate with the red velvet filling creates a more intense, less sweet truffle that’s really sophisticated. The color contrast of dark chocolate on the outside with bright red on the inside when you bite into one is stunning.
- Oreo Crumb Coating: Instead of dipping in melted chocolate, roll the frozen truffle balls in crushed Oreo crumbs. It’s faster, less messy, and adds a crunchy cookie texture. My kids love this version.
- Nutella Filling: Replace the cream cheese and icing sugar with 150g of Nutella. The chocolate-hazelnut flavor with red velvet is absolutely addictive. The filling is richer and a bit denser, which some people actually prefer.
- Peppermint Holiday Truffles: Add 1/2 teaspoon of peppermint extract to the truffle mixture and roll the coated truffles in crushed candy canes while the chocolate is still wet. Swap the red drizzle for green-tinted white chocolate. These are my December go-to.
- Cinnamon Spiced Version: Add 1 teaspoon of cinnamon and a pinch of nutmeg to the cake batter. The warm spice with the cream cheese filling is cozy and unexpected.
- Lemon Cream Cheese Truffles: Add 1 tablespoon of lemon zest to the cream cheese filling. The bright citrus note cuts through the sweetness and gives the truffles a more grown-up flavor.
- Vegan Adaptation: Use a vegan red velvet cake recipe (substitute eggs with flax eggs, butter with vegan butter, buttermilk with plant milk plus vinegar), vegan cream cheese for the filling, and dairy-free white chocolate for the coating. The texture is slightly different but still very good.
- Gluten-Free Version: Simply swap the plain flour for a 1:1 gluten-free baking blend. Everything else stays the same. I’ve tested this with Bob’s Red Mill 1-to-1 blend and it works perfectly.
Serving Suggestions
For a dessert table: Arrange the truffles on a tiered stand or a pretty plate. They look gorgeous stacked in a pyramid shape. Add a few fresh raspberries or strawberry slices around the plate for color contrast.
As a gift: Place 6-8 truffles in a small bakery box or clear cellophane bag tied with ribbon. Add a handwritten tag and you’ve got a gift that looks like it cost a fortune. I make these for teacher gifts every December and the reactions are always priceless.
For Valentine’s Day: Arrange truffles in a heart-shaped box (you can buy empty ones at craft stores). Use pink and red drizzle on the white chocolate coating. My husband said these were better than any box of chocolates he’s ever received, and I’m holding him to that statement forever.
For a party: Set them out in mini cupcake liners on a serving tray. This keeps them from rolling around and makes them easy for guests to grab. A sprinkle of edible glitter or crushed freeze-dried raspberries on top takes them from beautiful to show-stopping.
Beverage pairings: A cup of hot cocoa or a creamy latte is the coziest pairing. For celebrations, a glass of chilled Prosecco or champagne is perfect – the bubbles cut through the richness of the white chocolate. Coffee lovers will appreciate an espresso alongside these.

Red Velvet Cake Truffles FAQ
Yes, and this is a great shortcut for when you’re short on time. A box-mix red velvet cake or even a store-bought red velvet cake from the bakery section will work. Just make sure the cake is completely cooled before crumbling. The only thing you’ll lose is a tiny bit of that homemade flavor, but honestly, once it’s mixed with cream cheese and coated in white chocolate, most people won’t notice the difference. I’ve done this for last-minute parties and it saved me about an hour.
It takes a little practice, but here’s what works for me. Use a small cookie scoop to portion out the mixture so they’re all the same size. Then roll each one between your palms using gentle pressure – don’t squeeze too hard or they’ll crack. If the mixture feels sticky and keeps sticking to your hands, lightly dampen your palms with water or rub a tiny bit of coconut oil on them. The freezing step also helps – even if your balls aren’t perfectly round going in, the coating smooths out most imperfections.
White chocolate is notorious for this. The most common causes are overheating and moisture. Even a single drop of water or steam getting into the bowl can make white chocolate seize up into a thick, grainy mess. When microwaving, use very short intervals (15-20 seconds) and stir between each one. The chocolate should feel just barely warm, not hot. If it does seize, try adding half a teaspoon of vegetable oil or coconut oil and stirring vigorously. If that doesn’t work, you can switch to a double boiler method with very gentle heat – sometimes starting over with fresh chocolate is the easier option.
You can make these up to 10 days ahead and store them in the fridge, which makes them an ideal party prep dessert. I usually make them 2-3 days before an event so the flavors have time to come together. You can also break the process into stages: bake and cool the cake on day one, crumble and roll the truffles on day two, and dip and decorate on day three. Each stage takes less than 30 minutes of active work, which makes the whole project feel very doable even on busy weeks.
Absolutely. This truffle technique works with any cake flavor. I’ve made chocolate cake truffles dipped in dark chocolate, vanilla cake truffles coated in white chocolate with sprinkles, and lemon cake truffles with a lemon glaze drizzle. The ratio stays the same: one 8-inch cake to 200g cream cheese and 50g icing sugar. Just adjust the coating chocolate to complement the cake flavor. The fun part is experimenting with different combinations.
This usually means the cake-to-cream-cheese ratio is off, or the cake was too dry. If the mixture feels crumbly and won’t hold together, add more cream cheese a tablespoon at a time until it reaches a dough-like consistency that holds its shape when squeezed. If the mixture feels too wet and sticky, add a few tablespoons of cake crumbs or a sprinkle of icing sugar. The texture you’re aiming for is like Play-Doh – pliable, smooth, and holds its shape without cracking.
Recipes You May Like
- Red Velvet Cake with Cream Cheese Frosting – If you love the red velvet and cream cheese combination in these truffles, this full-sized layer cake is the ultimate version. It’s gorgeous and tastes incredible.
- Red Velvet Oreo Truffle Brownies – Another red velvet treat that combines cake, cream cheese, and chocolate. These brownies are rich, fudgy, and completely over the top.
- Chocolate Covered Strawberries – If you enjoy the chocolate-dipping technique from this recipe, these are another fun project. Same dipping skills, completely different dessert.
Conclusion
If there’s one recipe that consistently makes me look like a professional pastry chef (spoiler: I am very much not), it’s these Red Velvet Cake Truffles. The whole process – baking, crumbling, rolling, dipping, drizzling – is honestly kind of therapeutic once you get into a rhythm. And the payoff is a tray of stunning, candy-shop-quality truffles that taste even better than they look.
The first time might feel a little fiddly, especially the chocolate dipping part. But by your second or third truffle, you’ll find your groove. And by the time you’re boxing them up or setting them on a plate, you’ll feel like you just pulled off something really special. Because you did.
So grab some cream cheese, pick up some good white chocolate, and give these a go. They’re perfect for holidays, for gifts, or for any time you want a dessert that makes people genuinely gasp. I promise the reactions are worth every minute.
Don’t forget to save this to your Pinterest board for the next time you need a show-stopping treat. And if you make these, please share a photo in the comments – I love seeing how yours turn out!
Happy truffle making, Callie


Red Velvet Cake Truffles: A Sweet Treat for Any Occasion!

- Rich, creamy, and oh-so-delightful, these Red Velvet Cake Truffles feature a moist red velvet and cream cheese center, coated in smooth white chocolate. Perfect for parties, gifts, or as a sweet treat to indulge yourself, these truffles are as beautiful as they are delicious!
- Prep Time: 2 hours
- Cook Time: 25 minutes
- Total Time: 4 hours 25 minutes (includes setting time)
- Yield: 30 truffles 1x
- Category: Sweets
- Method: No-bake (after cake preparation)
- Cuisine: American-inspired
- Diet: Vegetarian
Ingredients
Cake
- 75 g unsalted butter
- 165 g caster sugar
- 2 medium eggs
- ½ tsp red food coloring
- 1 tsp vanilla extract
- 175 ml buttermilk
- 20 g cocoa powder
- 200 g plain flour
- ½ tsp baking powder
- ½ tsp bicarbonate of soda
- 1 tsp white wine vinegar
Truffles
- 200 g soft cream cheese
- 50 g icing sugar
Decoration
- 400 g white chocolate
- Red food coloring
Instructions
- Preheat the oven to 170ºC/150ºC fan and line an 8-inch (20 cm) cake tin with parchment paper.
- Beat the butter and caster sugar together until creamy. Add eggs, vanilla extract, and red food coloring, mixing until smooth.
- Sift in cocoa powder, flour, baking powder, and bicarbonate of soda. Add buttermilk and white wine vinegar. Mix until combined.
- Pour batter into the prepared tin, smoothing the surface, and bake for 35–40 minutes. Let the cake cool completely.
- Crumble the cooled cake into a bowl. Add cream cheese and icing sugar, mixing until smooth. Roll the mixture into tablespoon-sized balls and place on a lined tray. Freeze for 1 hour.
- Melt the white chocolate carefully. Dip each frozen truffle into the chocolate, letting the excess drip off. Place back on the lined tray.
- Color any leftover white chocolate with red food coloring and drizzle over the truffles. Chill until set.
Notes
- Truffles can be stored in the fridge for up to 10 days or frozen for up to 3 months.
- If storing at room temperature, use a buttercream filling instead of cream cheese.
- Customize the chocolate coating—try milk or dark chocolate for a different flavor.
- For vibrant red results, use high-quality gel or paste food coloring.
Nutrition
- Serving Size: 1 truffle
- Calories: 120
- Sugar: 12 g
- Sodium: 45 mg
- Fat: 7 g
- Saturated Fat: 4 g
- Unsaturated Fat: 2.5 g
- Trans Fat: 0 g
- Carbohydrates: 15 g
- Fiber: 0.5 g
- Protein: 2 g
- Cholesterol: 20 mg